The printer is reenabled, except for thesis printing.
If you need to print a thesis, you can make use of the „Fotostelle“ of the university’s library.
If you landed here, you are at Step B of the Thesis Printing instructions. Not sure where those are? Please check out the previous page! Above you can see your current thesis printing status (if you are logged in). Use the controls to start or stop thesis printing. Note that once you start and subsequently stop, you cannot start it again for the same thesis.
Step B: How to print your thesis?
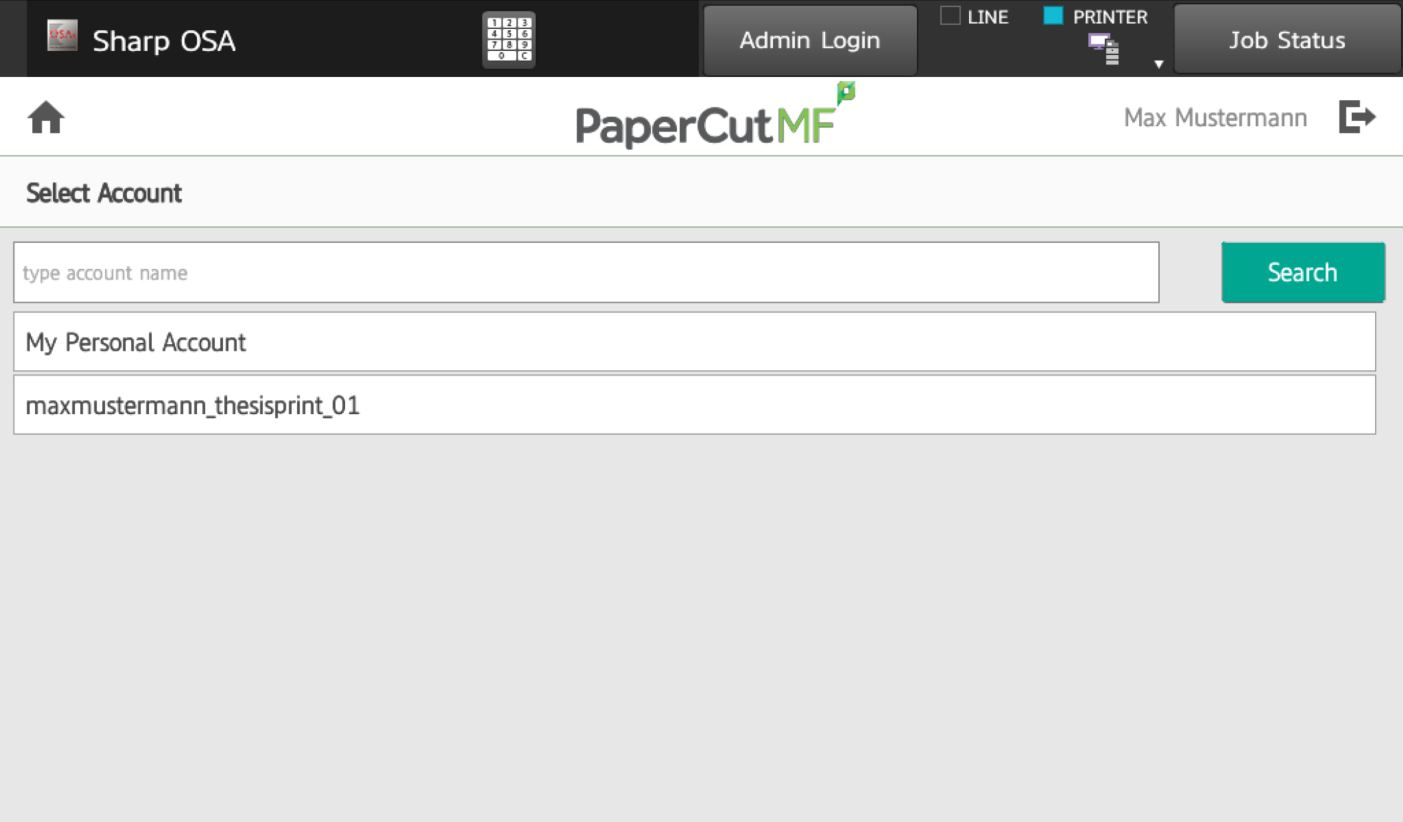
After enabling thesis printing on your account, you will have an additional special account available in your account while using the student printer. All prints and copies made on this account will be tallied on your thesis print invoice. The account is usually named something like yourname_thesisprint_01 . If you use Web Print, you can choose the account right on upload. If you use any other method, you can pick the account right at the machine (see images below).
Recommended Printing Settings
Just create and send a print job to the student printer as you would usually do on any of your devices as described in the general usage help.
We have special paper for thesis printing (clear white and 120g/m² thick) available in the printer that you can select while creating the print job. On your computer select Heavy Paper 1 as paper type. On mobile and web print select the printer with the heavy_paper or thick_paper suffix.
We recommend the following settings:
- Paper Size: A4
- Paper Type: Heavy Paper 1 / Thick Paper
- Color Mode: Automatic or Color (only actual color pages will be billed as such)
- Duplex: Yes (i.e. print on both sides of a paper)
- Number of copies: As much as you need (usually 3, check with your study regulations)
Also remember that you may need to print additional submission forms for the examination office. For example, Computer Science students need to carefully read this webpage. If you study something else, please get informed about the necessary documents.
If some pages were misprinted or not printed at all through no fault of your own, and they still appear in the accounting, please claim a refund on the Web Print page (even if you did not use Web Print / Upload Printing to print out the pages in the first place).
Account selection on login valid for copies only.
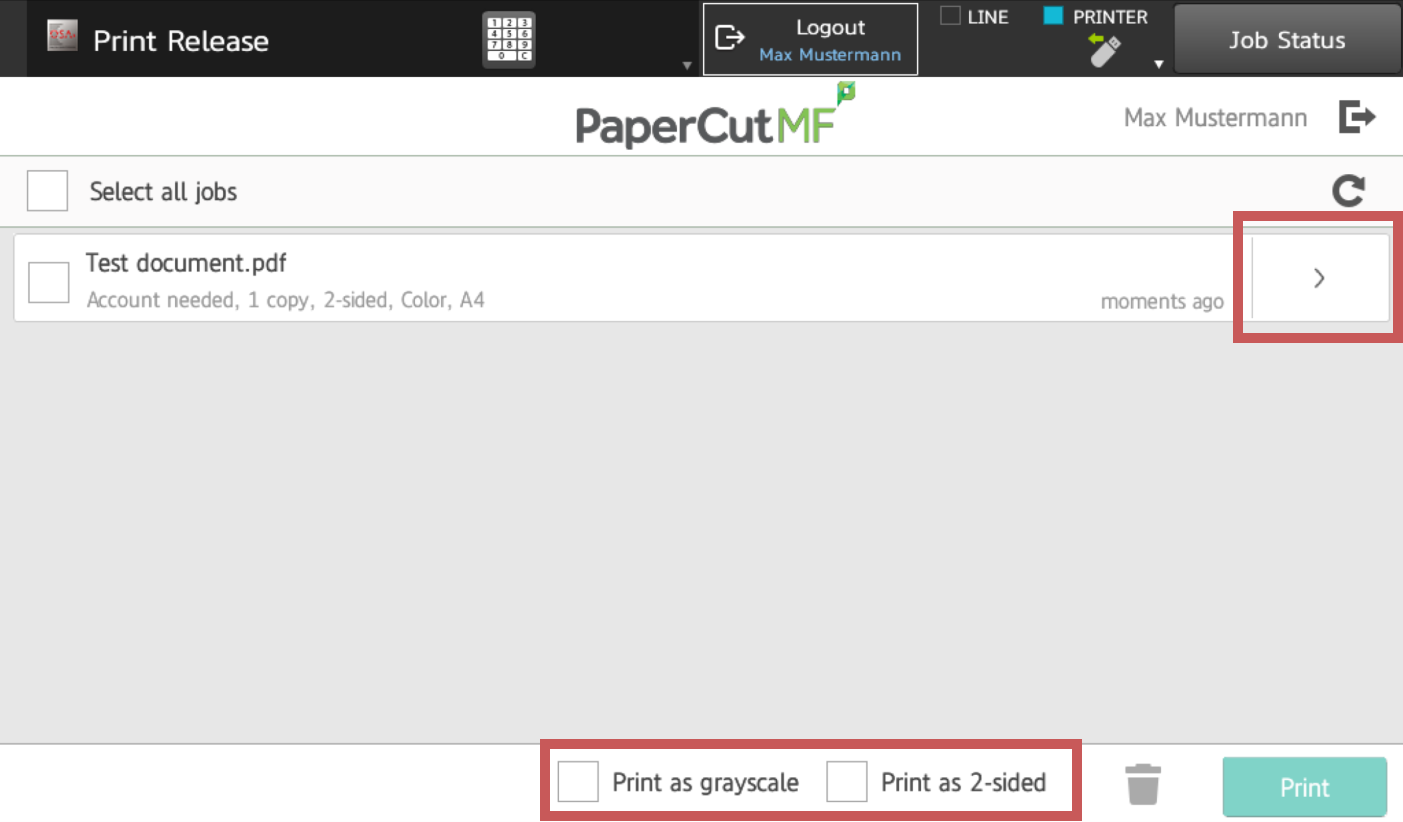
Select '>' on print jobs.
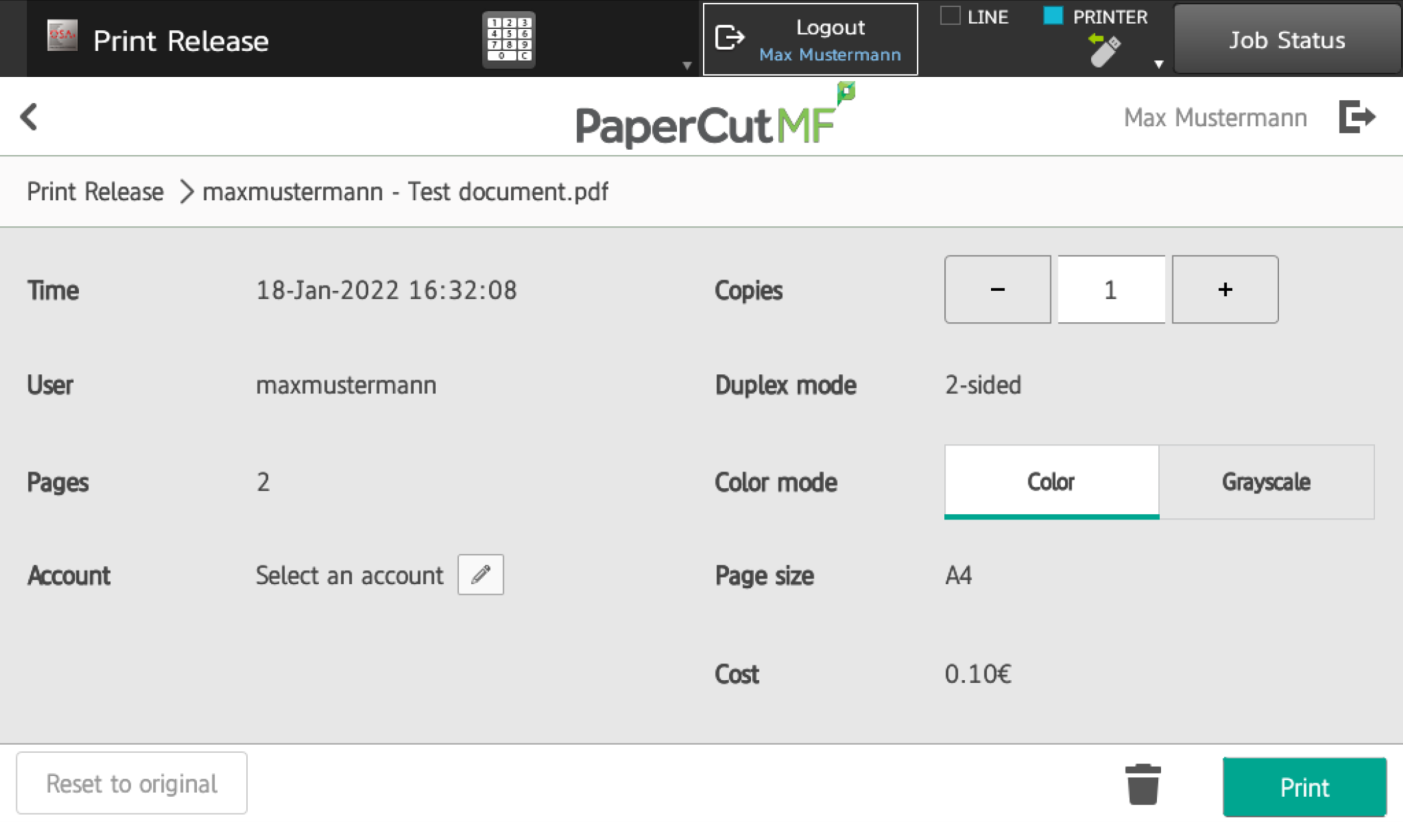
Select an account before print release.
Optional Step: Consider leaving an additional copy at the library
This is entirely optional: If you would like, you can leave an additional copy of your thesis at the library. This can be done at no additional cost for you, because the additional copy can be printed right at the library itself.
This is really great for everyone who wants their paper to be able to be cited, for example if you continue your research in that field.
More information about the procedure (it's not difficult!)
Step C: How to bind your thesis?
After you have printed all your needed copies, just head over to the Library for Computer Science and Mathematics (bldg. E2 3). Please take note of their opening hours.
At the reception desk ask the staff to bind your thesis. You will need to give them your name and printer account name and they will add the bindings to your invoice. Prepare to have your id card ready for identification.
Binding itself will take about 5 minutes, but the bindings will have to cool down for about half an hour before you can open them.
If you chose to submit an additional copy for archival purposes (see the last step), you may print out the additional copy at no cost right at the library.
Step D: How to end thesis printing?
When you're done with everything, i.e. printing and binding, you can end thesis printing by clicking on the End Thesis Print button above. Alternatively you can wait 7 days until thesis printing is ended automatically.
When thesis printing ends you will loose access to your special printing account and your prints and bindings will automatically be tallied and your invoice will be send to your student mail address. Please pay within 14 days either in cash at the students council or via bank transfer as described on the invoice.