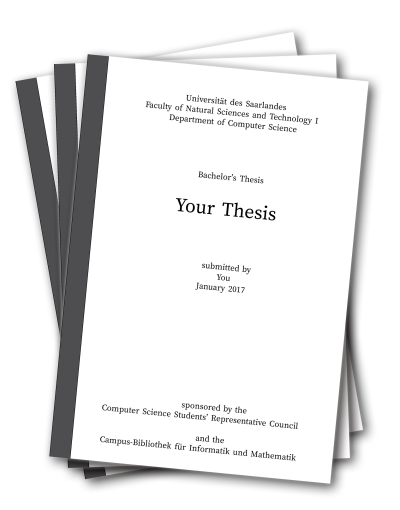
Thesis Printing & Binding
The students council offers students a special service: You can use the student printer to print and bind your thesis. Thesis printing is a self service, meaning that you print the thesis yourself (just as you would print any other document). After printing you go to the computer science library to bind the thesis.
Please note two important things:
- This is a paid service, i.e. after printing and binding you will receive an invoice that you have to pay (via cash or bank transfer).
- We offer it as a self-service process. That means that we will not print your thesis for you, but you have to carefully read the instructions below and print it. Also, since we cannot guarantee that in case of problems anyone is available to help immediately, we recommend you to print your thesis early, so that you will not get stuck in a critical time before the submission deadline.
Cost
Thesis printing is a paid service, i.e you will receive an invoice that you have to pay after using it. You have the following costs:
- The price rates for the printouts can be seen in the Papercut interface.
- Each binding costs 0.50€.
The total cost is the sum of your printout costs and the costs for the bindings. There are no costs beyond that.
Procedure
Step A: Preparing
- Register for the printer and read about its usage. If this is your first time using the Student Printer, try printing a small document (maybe the first page of your thesis) with your free printing quota.
Hint: Even though Web Print allows to print documents quickly without the hassle of a set up, we strongly recommend you to install the driver! Web Print introduces a multitude of issues that cannot be easily dealt with, and you might encounter problems. For example, it does not deal well with large documents (which thesis printouts normally are). - Prepare your document as an A4 sized PDF. Please make sure that the size of the document really is (and does not just look like) A4, otherwise, the printer might show an "Empty Paper" error.
- Familiarize yourself with the costs of Thesis printing below.
- Ready? Go to the Thesis Print Control Page (linked on the bottom of this page or below), and click on the "Start Thesis Print" button after reading the disclaimer. You have now 7 days to print your thesis.
Step B: Submit your document to the printer and release it.
The printer is located in E1.3, student working room 013. Keep in mind that printing via USB is not supported, so it makes sense to take your laptop with you.
- We recommend printing on thick/heavy paper. It is clear white 120g/m² paper, ideal for double-sided thesis printing.
- Don't forget to select your thesis printing account (usually of the name
yourname_thesisprint_01). Your "normal" account will probably not have enough credits for a whole thesis.- If you use Web Print, the account selection screen appears at the document upload.
- Otherwise, you can select the account while realeasing the document at the machine itself.
- We recommend printing out one copy first, so that you can check if everything looks fine.
- Afterwards, you can print as many more copies as you need.
- Double-check if all printouts are okay.
Hint: Is something printed out weirdly or not at all? Have you encountered errors but the prints have nevertheless been accounted for? Just get in touch with us, and we will do our best to find a solution.
Optional Step: Consider leaving an additional copy at the library
This is entirely optional: If you would like, you can leave an additional copy of your thesis at the library. This can be done at no additional cost for you, because the additional copy can be printed right at the library itself.
More information about the procedure (it's not difficult!)
Step C: Binding
Go to the CompSci/Math library (consider the opening hours, do not go there shortly before it closes!) and let them bind your thesis. Our bindings are simple plastic covers. If you want fancier (and probably more expensive) bindings, such as hardcovers, you can skip this step and let the thesis be bound somewhere else. For example, you can ask the SULB or any copyshop downtown.
If you chose to submit an additional copy for archival purposes (see the last step), you may print out the additional copy at no cost right at the library.
Step D: Payment
- Go back to the Thesis Print Control Page and confirm that you are done by clicking on the "End Thesis Print" button.
- You will receive an invoice. Pay it via cash or bank transfer.