The printer is reenabled, except for thesis printing.
If you need to print a thesis, you can make use of the „Fotostelle“ of the university’s library.
Linux & macOS
This site describes how to set up and use the Student Printer on Linux and macOS. You can use the command line or do the setup in the CUPS GUI.
Tested Systems
We tested the setup on the operating systems listed below. Please tell us your experiences with installing the printer under various Linux systems, so we can add them. As the interface may slightly vary from system to system you might need to adjust the steps accordingly.
- Linux (tested and working): Arch 2023, Debian 10, Ubuntu 20.04
- macOS (tested and working): 11 Big Sur, 12 Monterey
Command Line Setup
0 Make sure you are registered for the student printer and have an account. Otherwise, all print jobs send by you to the printer will be silently discarded!
1 Download the printer driver (in Linux this is a
.ppd file). If wget is not available, you can also download it through your browser here.
wget -O student_printer.ppd https://print.cs.fs.uni-saarland.de/web/drivers/student_printer.ppd2 Now create a new printer in CUPS. In the following command, replace
name00001 with your print account name in the format name0001 or s8name. This will match any jobs coming from your computer with your printing account. You may also change the printer name CS_FS_Student_Printer or the description CS FS Student Printer. The latter is used in macOS as display name. In various Linux systems both may be used as display name.
lpadmin -v "https://print.cs.fs.uni-saarland.de:443/printers/student_printer" -P "student_printer.ppd" -p "CS_FS_Student_Printer" -D "CS FS Student Printer" -o JCLUserName=Custom.name00001 -o printer-error-policy=abort-job -E
If you get a warning lpadmin: Printer drivers are deprecated and will stop working in a future version of CUPS you can safely ignore it.
This command installs the printer. You can find explanation about the various lpadmin optionshere and below:
lpadmin configures printer and class queues provided by CUPS.-v sets the device URI of the printer queue.-P specifies a PostScript Printer Description (PPD) file to use with the printer.-p set the printer name (the printer name cannot contain spaces, tabs, / or #)-D set the printer description (this is the display name in macOS)-o sets an option for the printer.-E enables the printer for printing
3 The student printer is now set up on your computer. You may now print from any application, as you would normally do. Then go to the student printer and release your prints from the print queue. Read more about that here.
CUPS GUI setup
If you are more comfortable to use a GUI to set up a printer, you can follow these steps to set up the printer via the CUPS GUI.
Linux & macOS PPD Driver File ~15KB
- Download the pdd file above and save it in an accessible location on your computer.
- Open a web browser and navigate to
http://localhost:631. This is the local interface of your CUPS installation. - If you are asked to authenticate at any time during the setup, you need to enter a valid local user name and password with sudo/admin rights from your local computer. This is usually the same username and password that you use to log into your computer. Don't worry, this is not a webpage on the internet, but a local program running on your computer.
- Click on Administration and then on Add Printer
- Select Internet Printing Protocol (https) and click on continue.
- Enter
https://print.cs.fs.uni-saarland.de:443/printers/student_printerand click on continue. - Enter the desired printer name, optionally add a description. (Either may be used as display name on Linux. The latter is used as display name on macOS). Do not check "share this printer".
- In the next step, click on browse and select the PPD file you downloaded above.
- You are now asked to choose the default printing options. We recommend you to leave the ones you see as they are reasonable (you can, of course, change them on each printout separately). However, you will need to enter your printer account user name so we can match the print jobs you send. If you fail to set this correctly, your print jobs will be silently discarded. Select the Printer Account tab, choose "Custom" on the Printer Account setting and enter your printer user name.
- Click on 'Select default option'.
Now the student printer is set up on your computer. You may now print from any application, as you would normally do. Then go to the student printer and release your prints from the print queue. Read more about that here.
Submit Print Jobs on Linux & macOS
After having set up the printer using one of the methods above, you can print from any application as you would do normally. You only need to make sure to set a correct user name while printing. Before printing you might want to change some settings like double-sided printing, paper type or color settings. You can also temporarily set some different printer user name.
Example screens on macOS 12 Monterey:
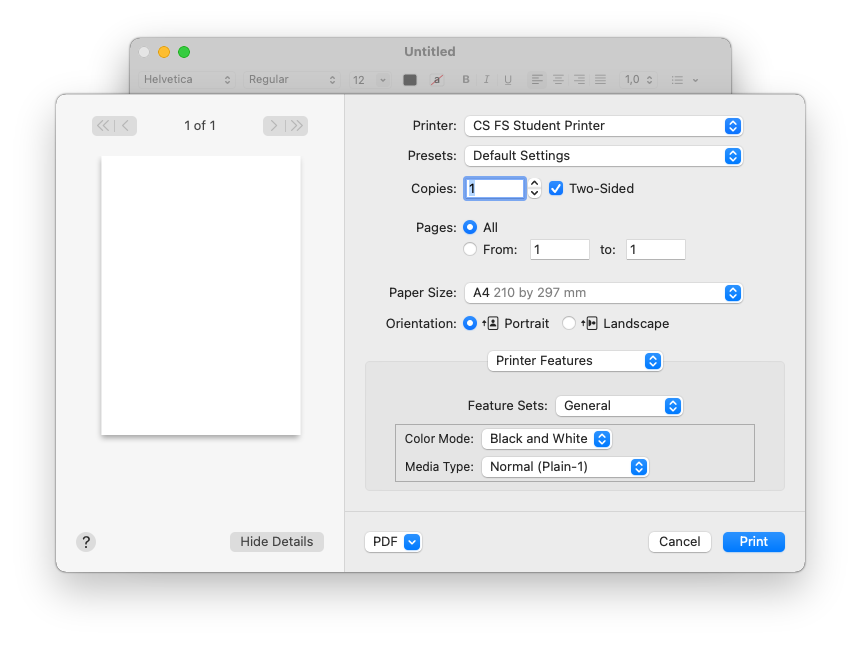
Color & Paper Type
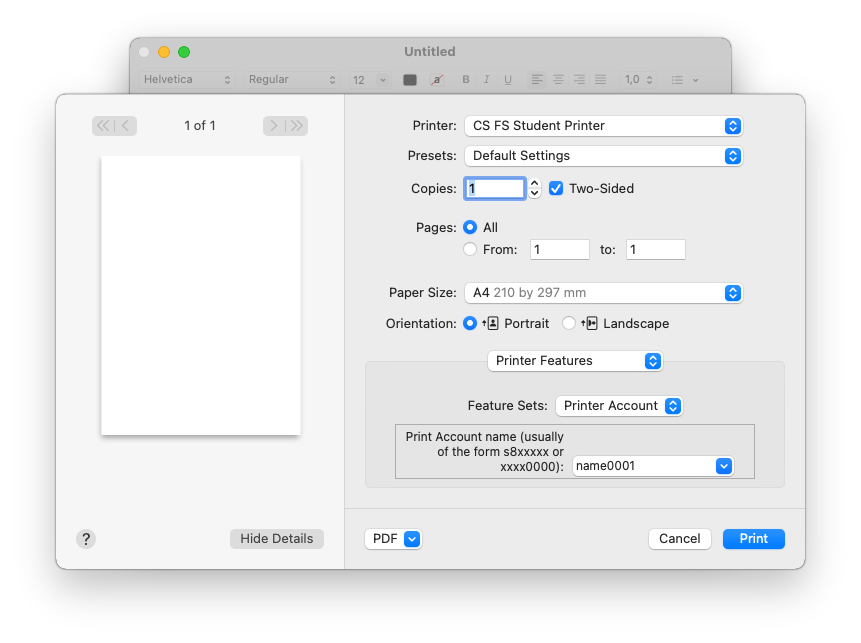
Printer Account
Example Screens on Ubuntu 21.10:
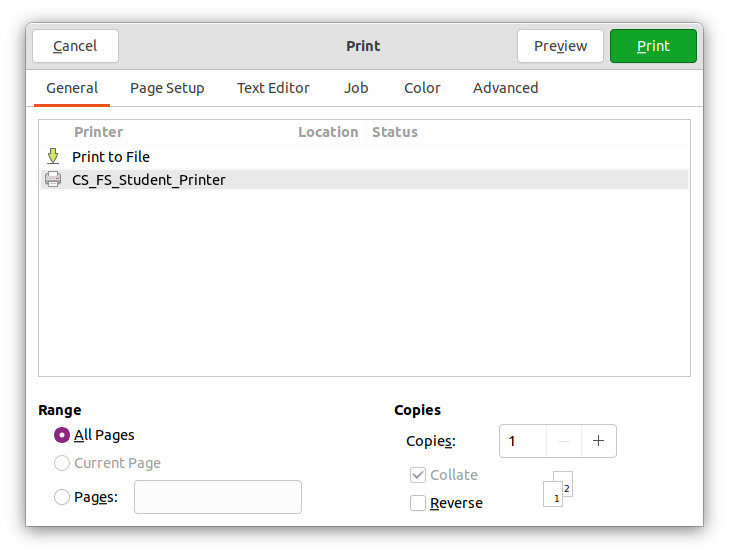
Printer selection
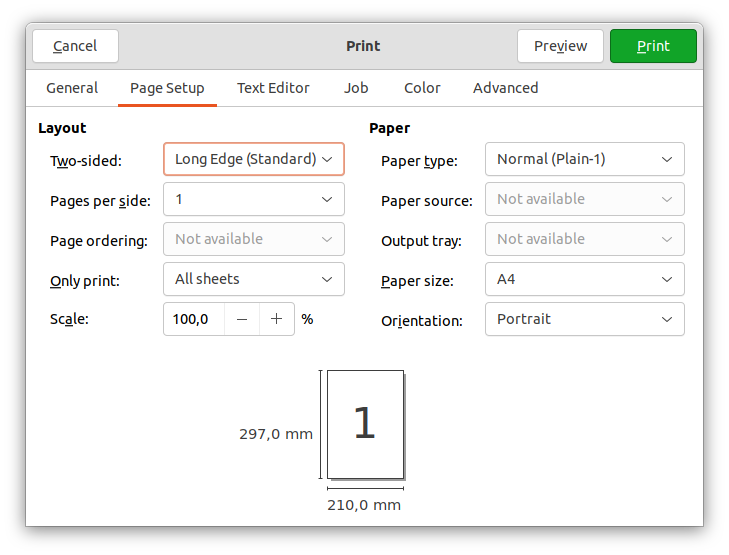
Duplex & Paper Type
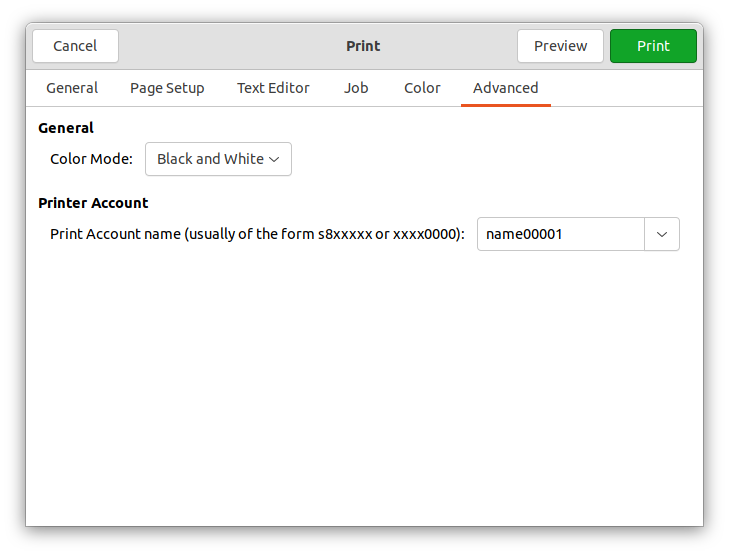
Color & Printer Account
Change Default Printing Settings
You may change the default printing settings and the default printer account name.
Command Line
If you just want to change your student ID via the command line, you can use the following command. Replace name0001 with the desired name.
lpadmin -p "CS_FS_Student_Printer" -o "JCLUserName=Custom.name00001"
CUPS GUI
Via the CUPS GUI you may change several settings like the default color mode or double-sided printing.
- Go to
http://localhost:631 - Select the Printers tab
- Click on the Student Printer
- On the "Administration" dropdown, pick "Set Default Options"
- You can change your preferred default settings here. On the Printer Account tab, you can change your default printer account name.
Do not click on "Query printer for default options" as it will not work and might cause unwanted effects.
Delete Student Printer
If you want to entirely remove the student printer from the system, you may this use the following steps.
Command Line
Run the following command line to remove the student printer from your system.
lpadmin -x "CS_FS_Student_Printer"
CUPS GUI
Via the CUPS GUI you can remove the student printer as follows:
- Go to
http://localhost:631 - Select the Printers tab
- Click on the Student Printer
- On the "Administration" dropdown select "Delete Printer"